Creating Sheet Queries
Queries in Sheety App allow you to filter and select specific columns from your sheets, making it easier to work with your data in apps and widgets. This tutorial will guide you through creating your first query.
What You’ll Learn
Section titled “What You’ll Learn”- How to access the Queries section
- Creating a query to select specific columns
- Understanding query configuration options
- Viewing query results
Prerequisites
Section titled “Prerequisites”- Access to Sheety App at your instance URL
- A workbook with at least one sheet containing data
- Complete the Creating Your First Workbook tutorial
Understanding Queries
Section titled “Understanding Queries”Queries allow you to:
- Select specific columns from a sheet
- Filter data using Q-Predicate expressions
- Transform and aggregate data for use in apps and visualizations
Queries are essential for creating widgets in apps, as widgets require queries to specify what data to display.
Step 1: Accessing the Queries Section
Section titled “Step 1: Accessing the Queries Section”From your workbook sidebar, you’ll need to expand the Data section to access Queries:
- Look for the expandable sections in the left sidebar
- Click to expand the section that contains “Fields” and “Queries”
- Click on “Queries” to navigate to the Queries page
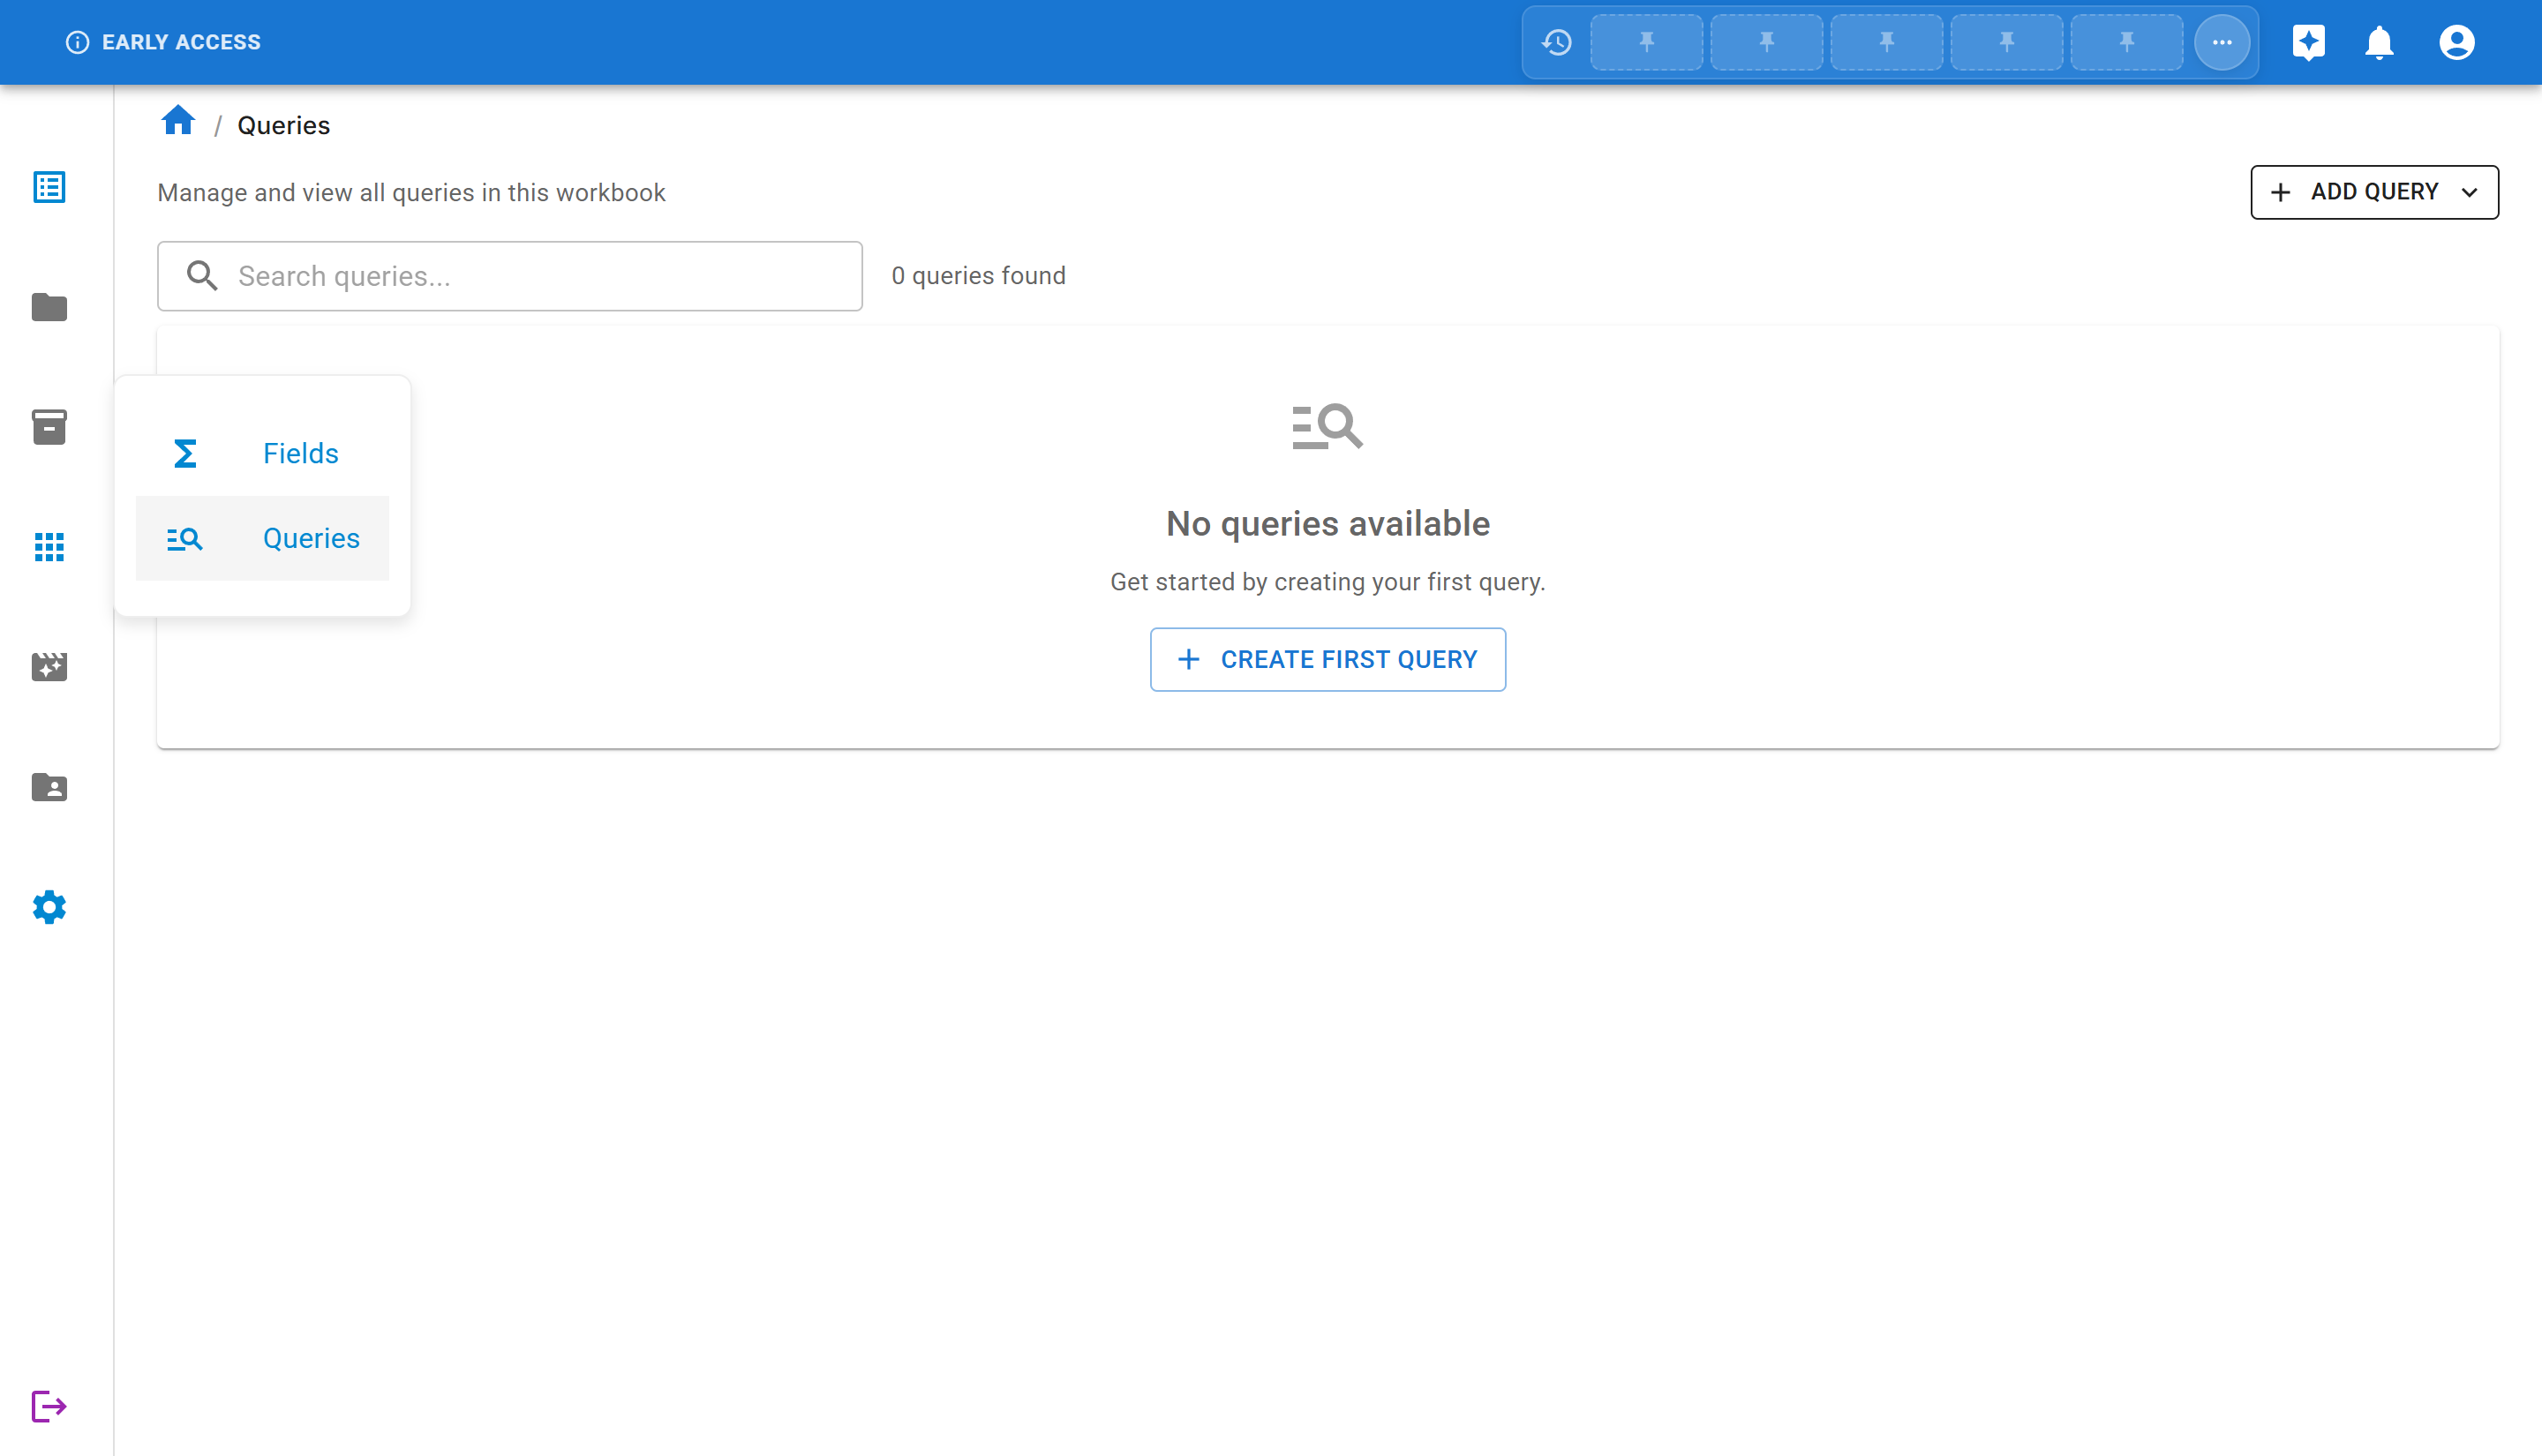
When you first access the Queries section in a new workbook, you’ll see:
- A search bar to filter queries
- An “ADD QUERY” button in the top right
- The current count (0 queries found initially)
- A “CREATE FIRST QUERY” button to get started
Step 2: Create a New Query
Section titled “Step 2: Create a New Query”Click on the “CREATE FIRST QUERY” button. A menu will appear showing all available sheets in your workbook. Select the sheet you want to query data from.
For this tutorial, we’ll use an “Employees” sheet that contains employee data with departments and salaries.
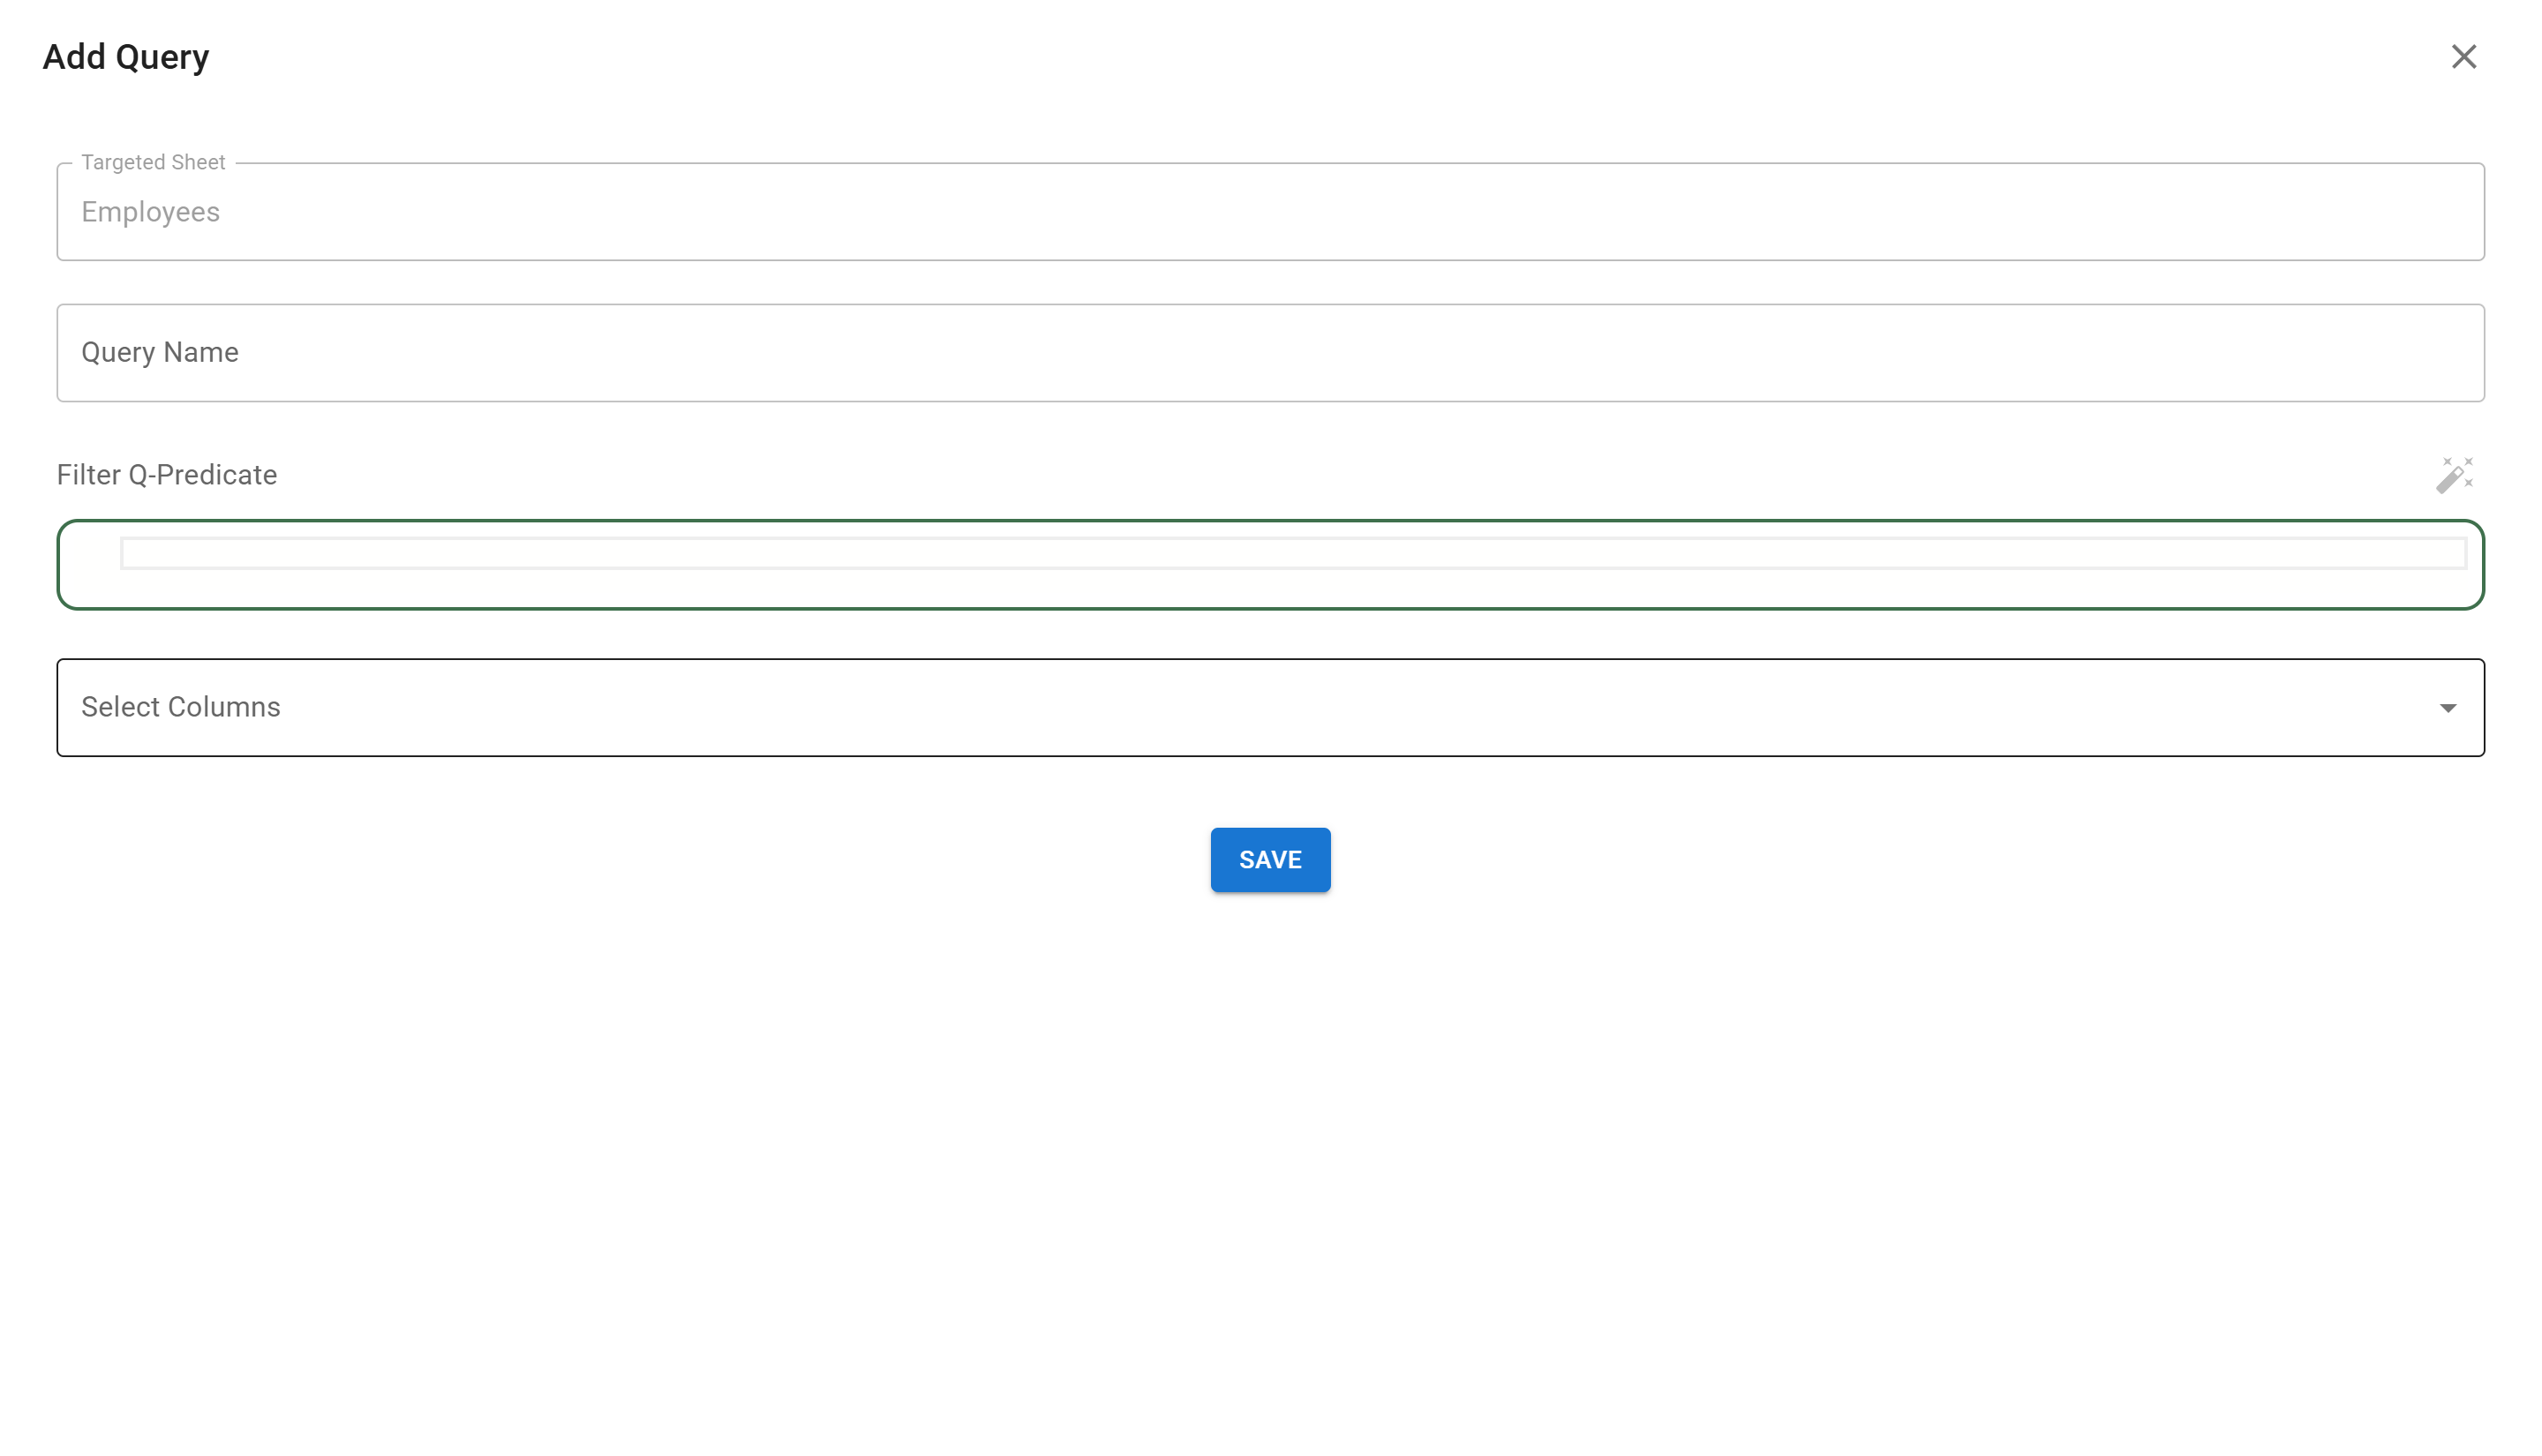
The Add Query form includes:
- Targeted Sheet: The sheet you selected (cannot be changed)
- Query Name: A descriptive name for your query
- Filter Q-Predicate: Optional filter expression to limit rows
- Select Columns: Choose which columns to include in the query results
Step 3: Configure Your Query
Section titled “Step 3: Configure Your Query”Let’s create a query to get salary information by department:
1. Enter a Query Name
Section titled “1. Enter a Query Name”Type a descriptive name for your query, for example: Salary by Department
2. Select Columns
Section titled “2. Select Columns”Click on the “Select Columns” dropdown to see all available columns from your sheet.
For our salary by department query, select:
- Department: To group by department
- Salary: To show salary values
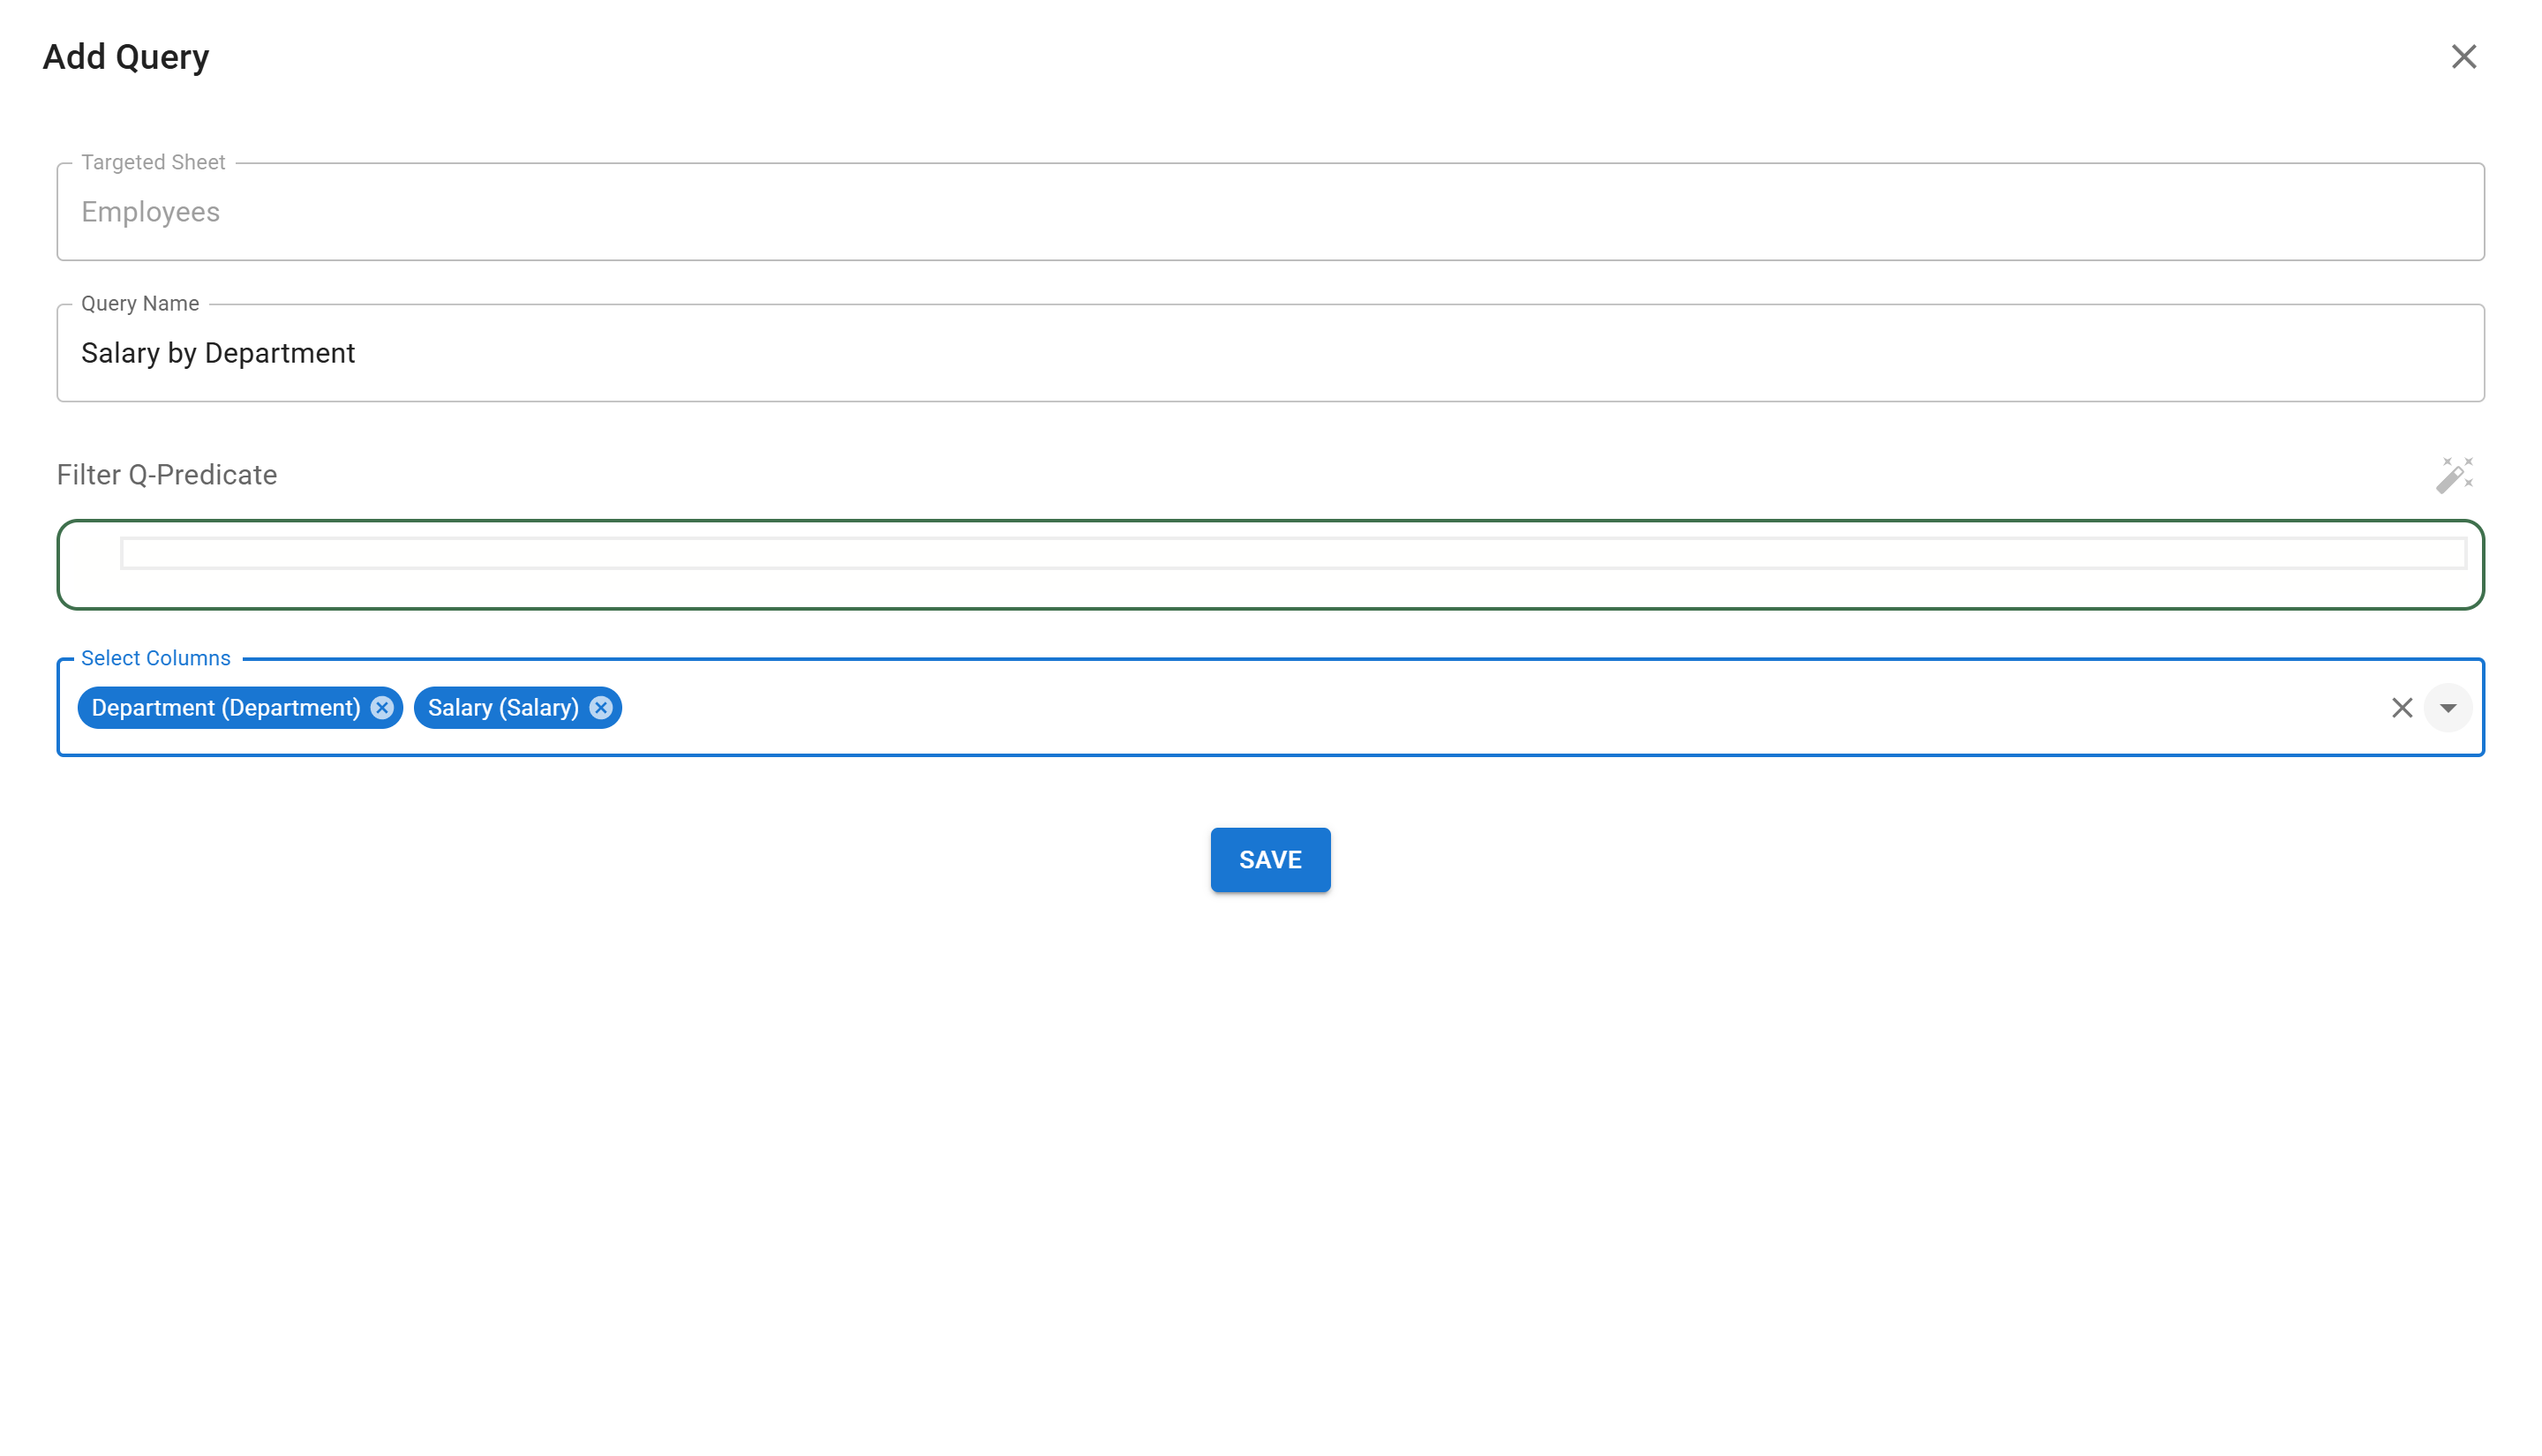
You can select multiple columns by clicking on each one. Selected columns will appear as chips above the dropdown.
3. Filter Q-Predicate (Optional)
Section titled “3. Filter Q-Predicate (Optional)”The Filter Q-Predicate field allows you to filter which rows are included in the query results. This uses Sheety App’s Q-Expression language.
For example:
- To filter only Engineering department:
@Department.Text = 'Engineering' - To filter salaries above 50000:
@Salary > 50000 - To combine conditions:
@Department.Text = 'Engineering' and @Salary > 50000
For this tutorial, we’ll leave the filter empty to include all rows.
Step 4: Save and View Results
Section titled “Step 4: Save and View Results”Click the “SAVE” button to create your query. You’ll be redirected to the query detail page showing the results.
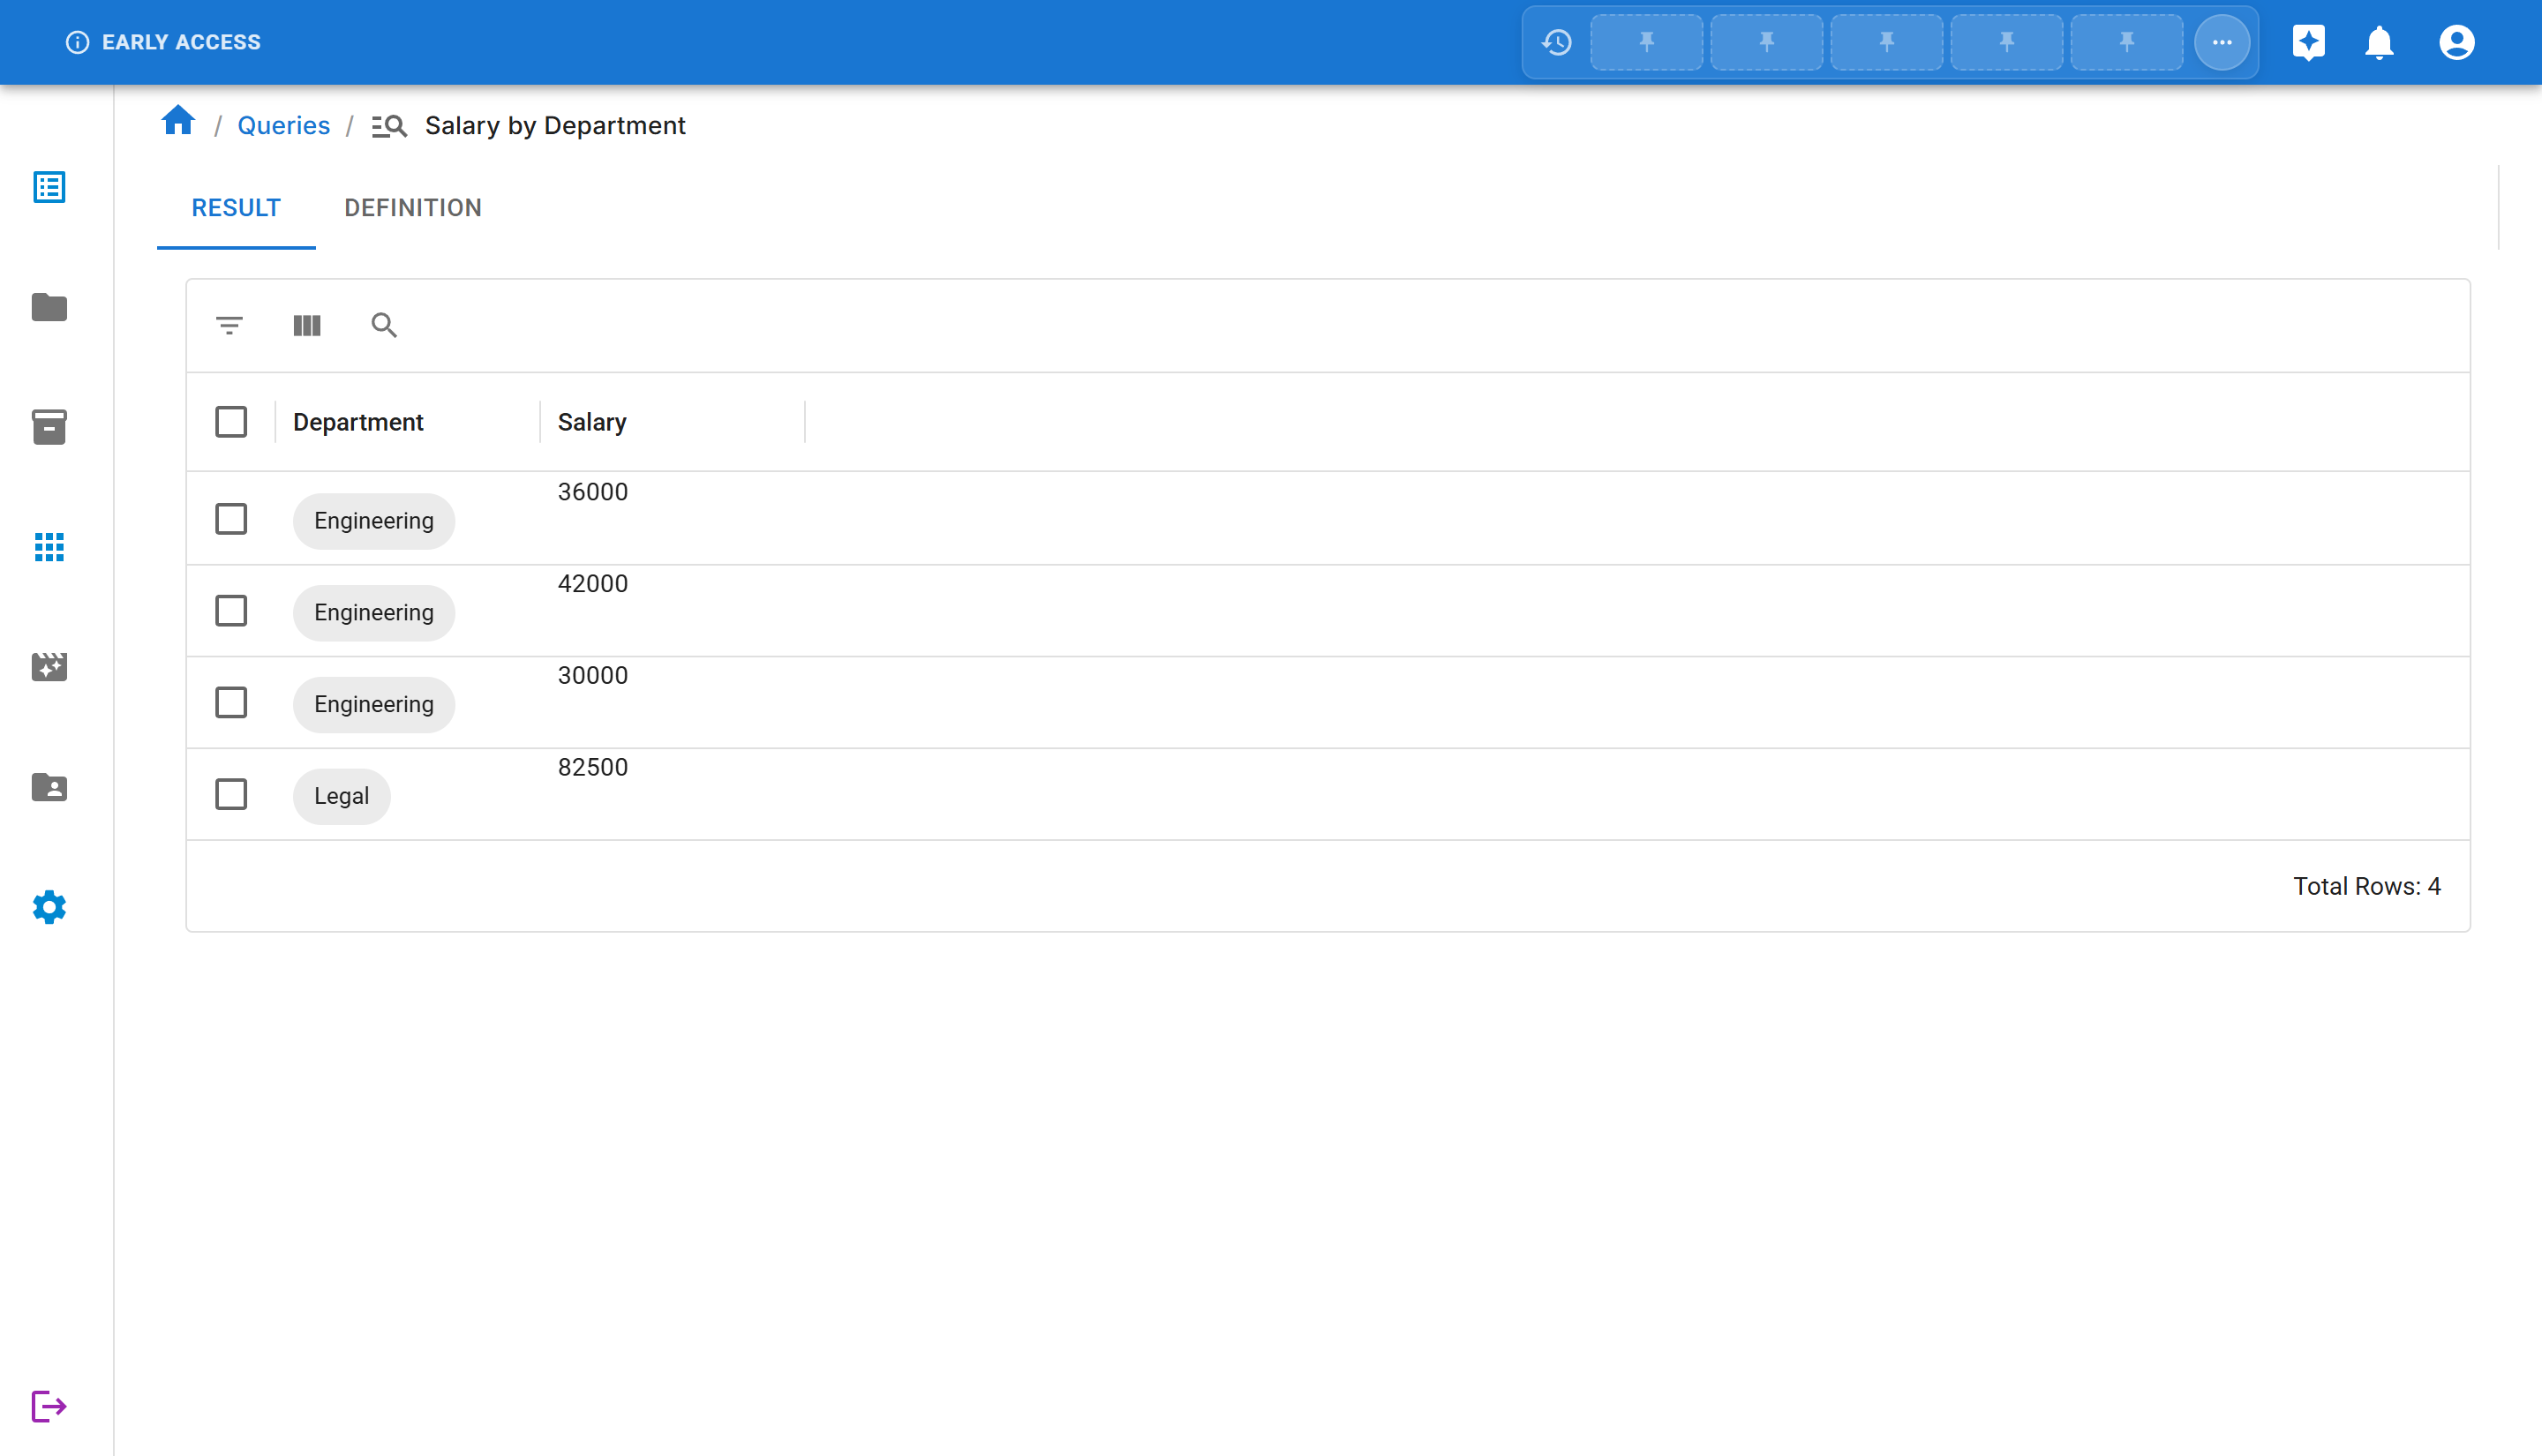
The query result page displays:
- Result tab: Shows the data returned by your query
- Definition tab: Shows the query configuration
- A data grid with the selected columns
- Total row count at the bottom
In our example, the query returns all rows with Department and Salary columns, showing:
- 3 employees in the Engineering department
- 1 employee in the Legal department
Next Steps
Section titled “Next Steps”Now that you’ve created a query, you can:
- Use it in an App: Queries are required for adding widgets to apps. See Creating Your First App to learn how to use queries in widgets.
- Create More Complex Queries: Add filter expressions to narrow down your data
- Experiment with Different Column Combinations: Select different columns for different purposes
Summary
Section titled “Summary”Congratulations! You’ve successfully created your first query in Sheety App. You learned:
- ✅ How to navigate to the Queries section
- ✅ How to create a new query on a sheet
- ✅ How to select specific columns
- ✅ How to view query results
- ✅ When and why to use queries
Queries are fundamental to building apps in Sheety App, as they power all data-driven widgets. Continue to the app creation tutorial to see how to use your queries in visualizations!