Column Management Page
The Columns management page provides a centralized location to view, create, edit, and organize all columns in your sheet. This page is ideal when you need to manage multiple columns at once or want to see an overview of your sheet’s structure.
Accessing the Column Management Page
Section titled “Accessing the Column Management Page”There are several ways to access the Columns management page:
From the Sheet Menu
Section titled “From the Sheet Menu”- Navigate to your sheet
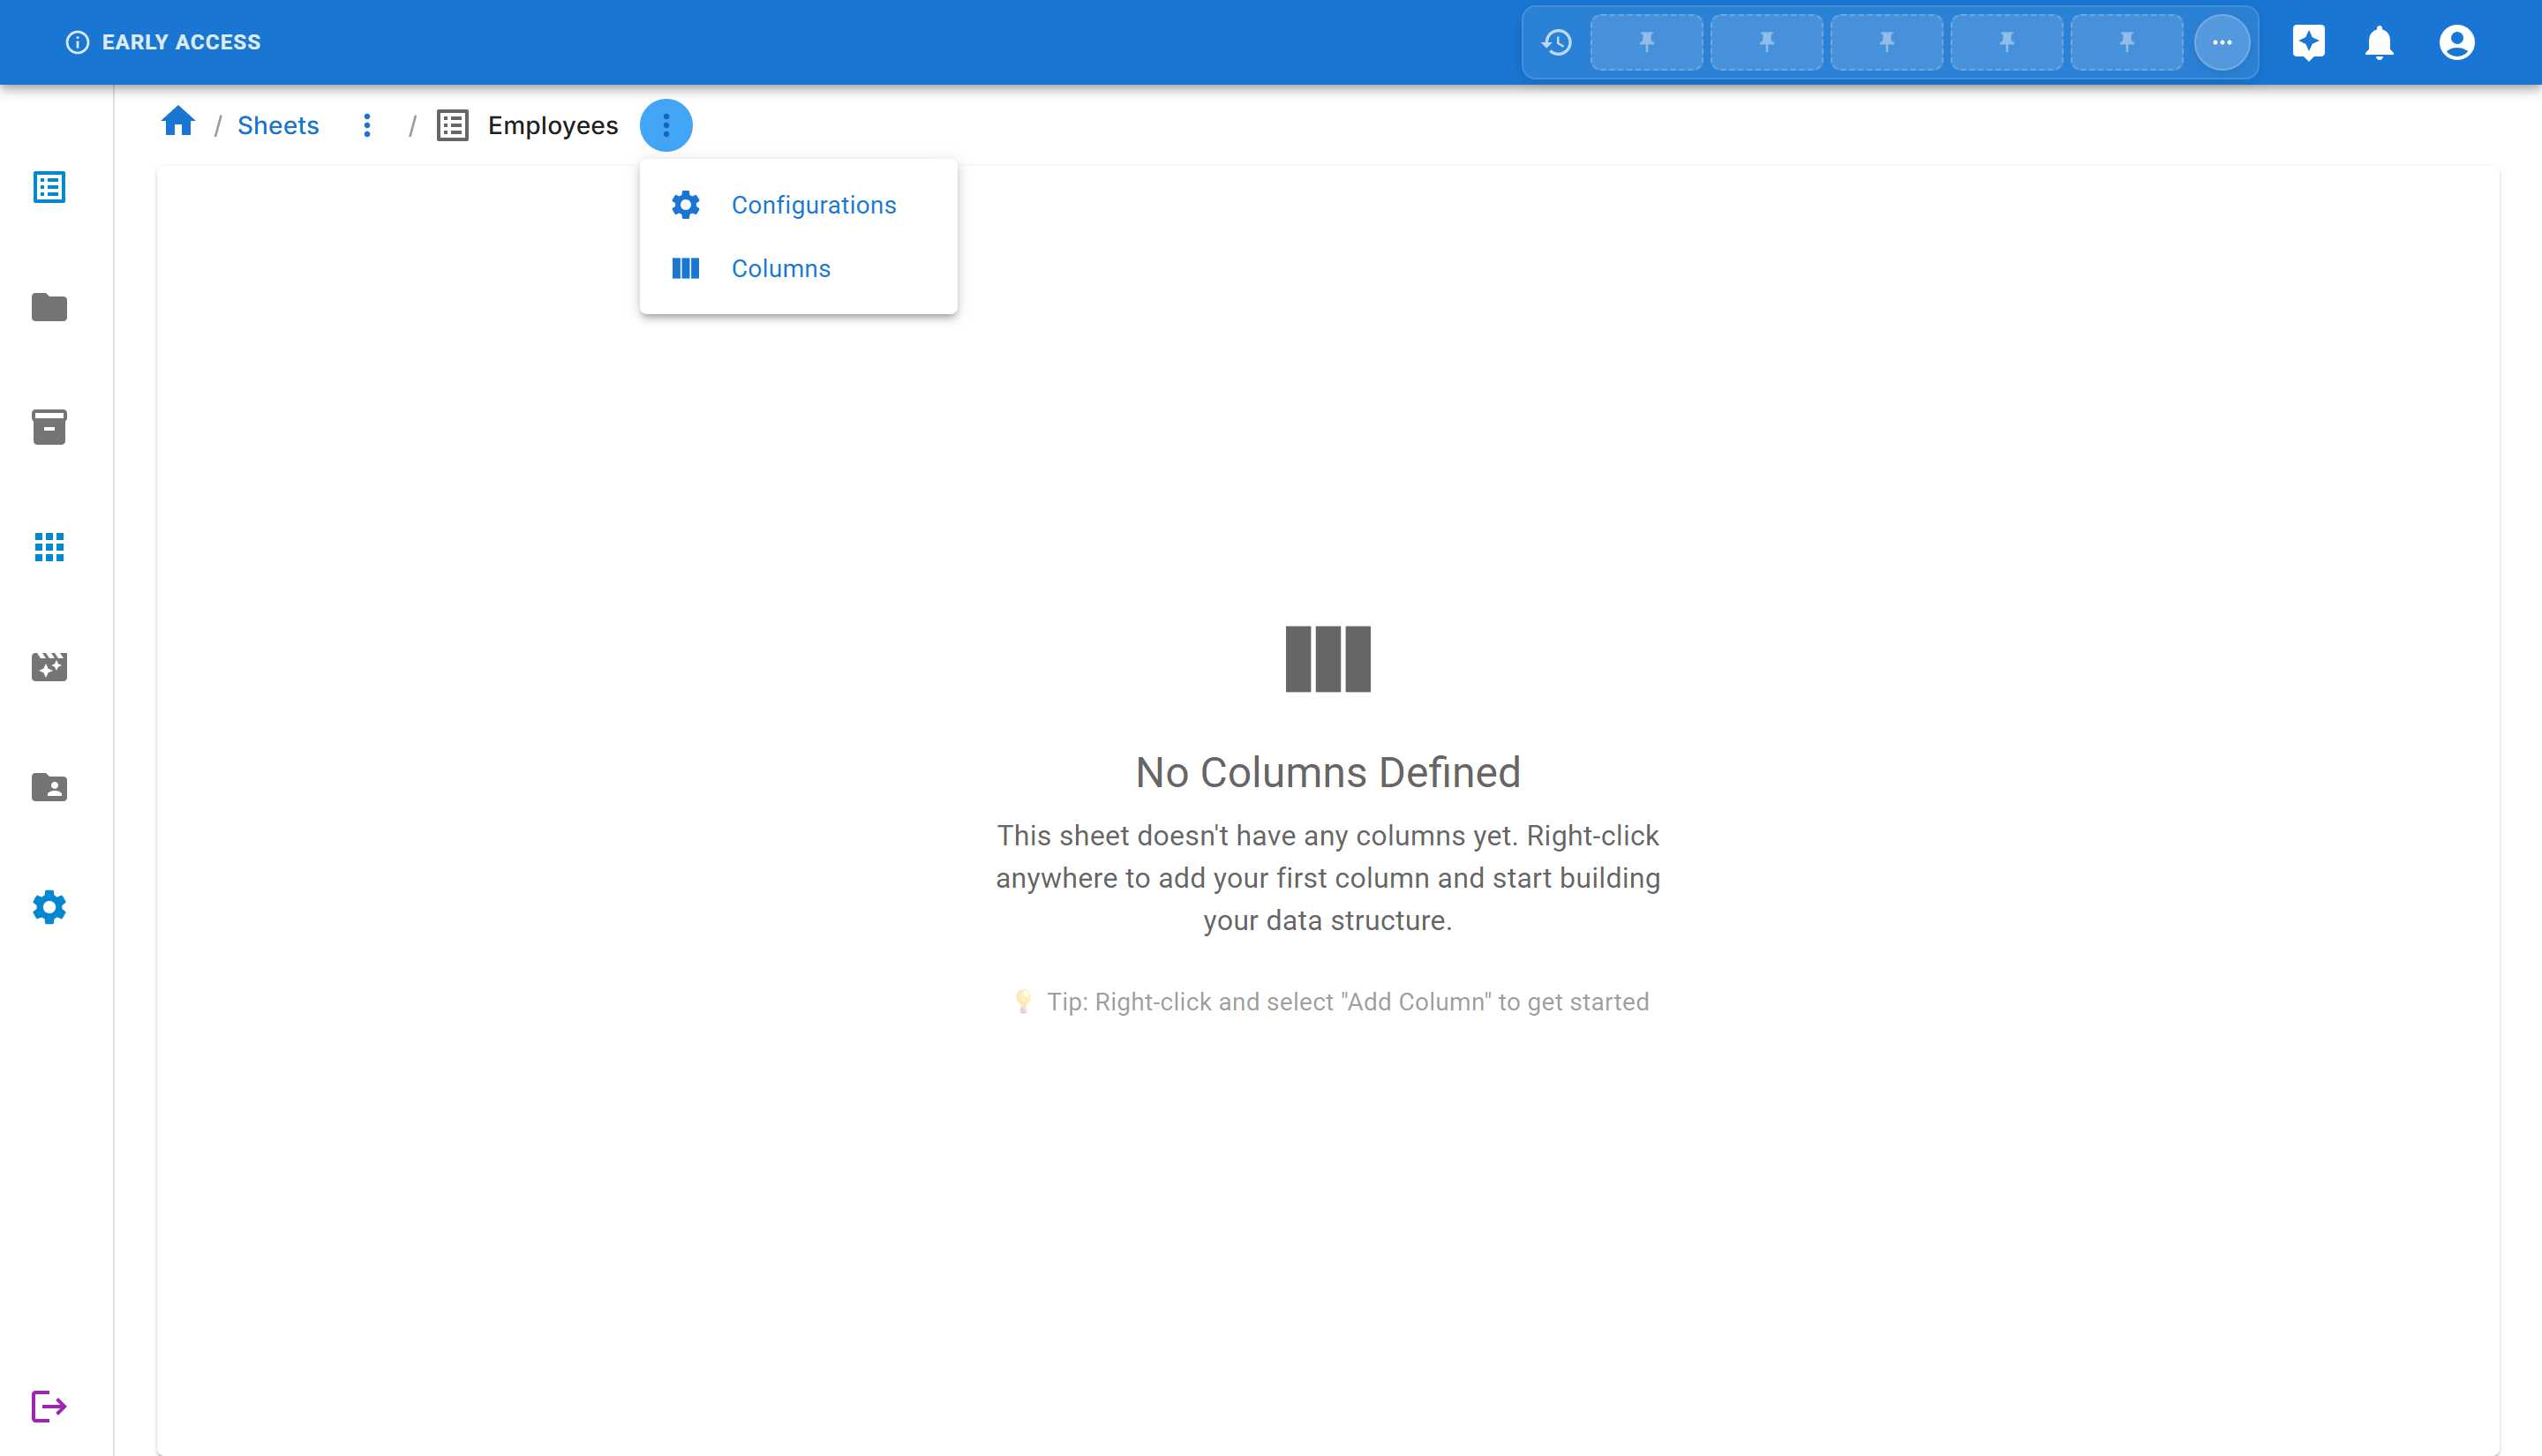
- Click the three dots menu (⋯) next to the sheet name in the breadcrumb
- Select “Columns” from the dropdown menu
From the Toolbar
Section titled “From the Toolbar”When viewing a sheet, click the “Columns” button in the toolbar at the top of the data grid.
From the Sheet Settings
Section titled “From the Sheet Settings”In the sheet settings page, you’ll find a link to manage columns.
Overview of the Columns Management Page
Section titled “Overview of the Columns Management Page”Once you access the Columns page, you’ll see:
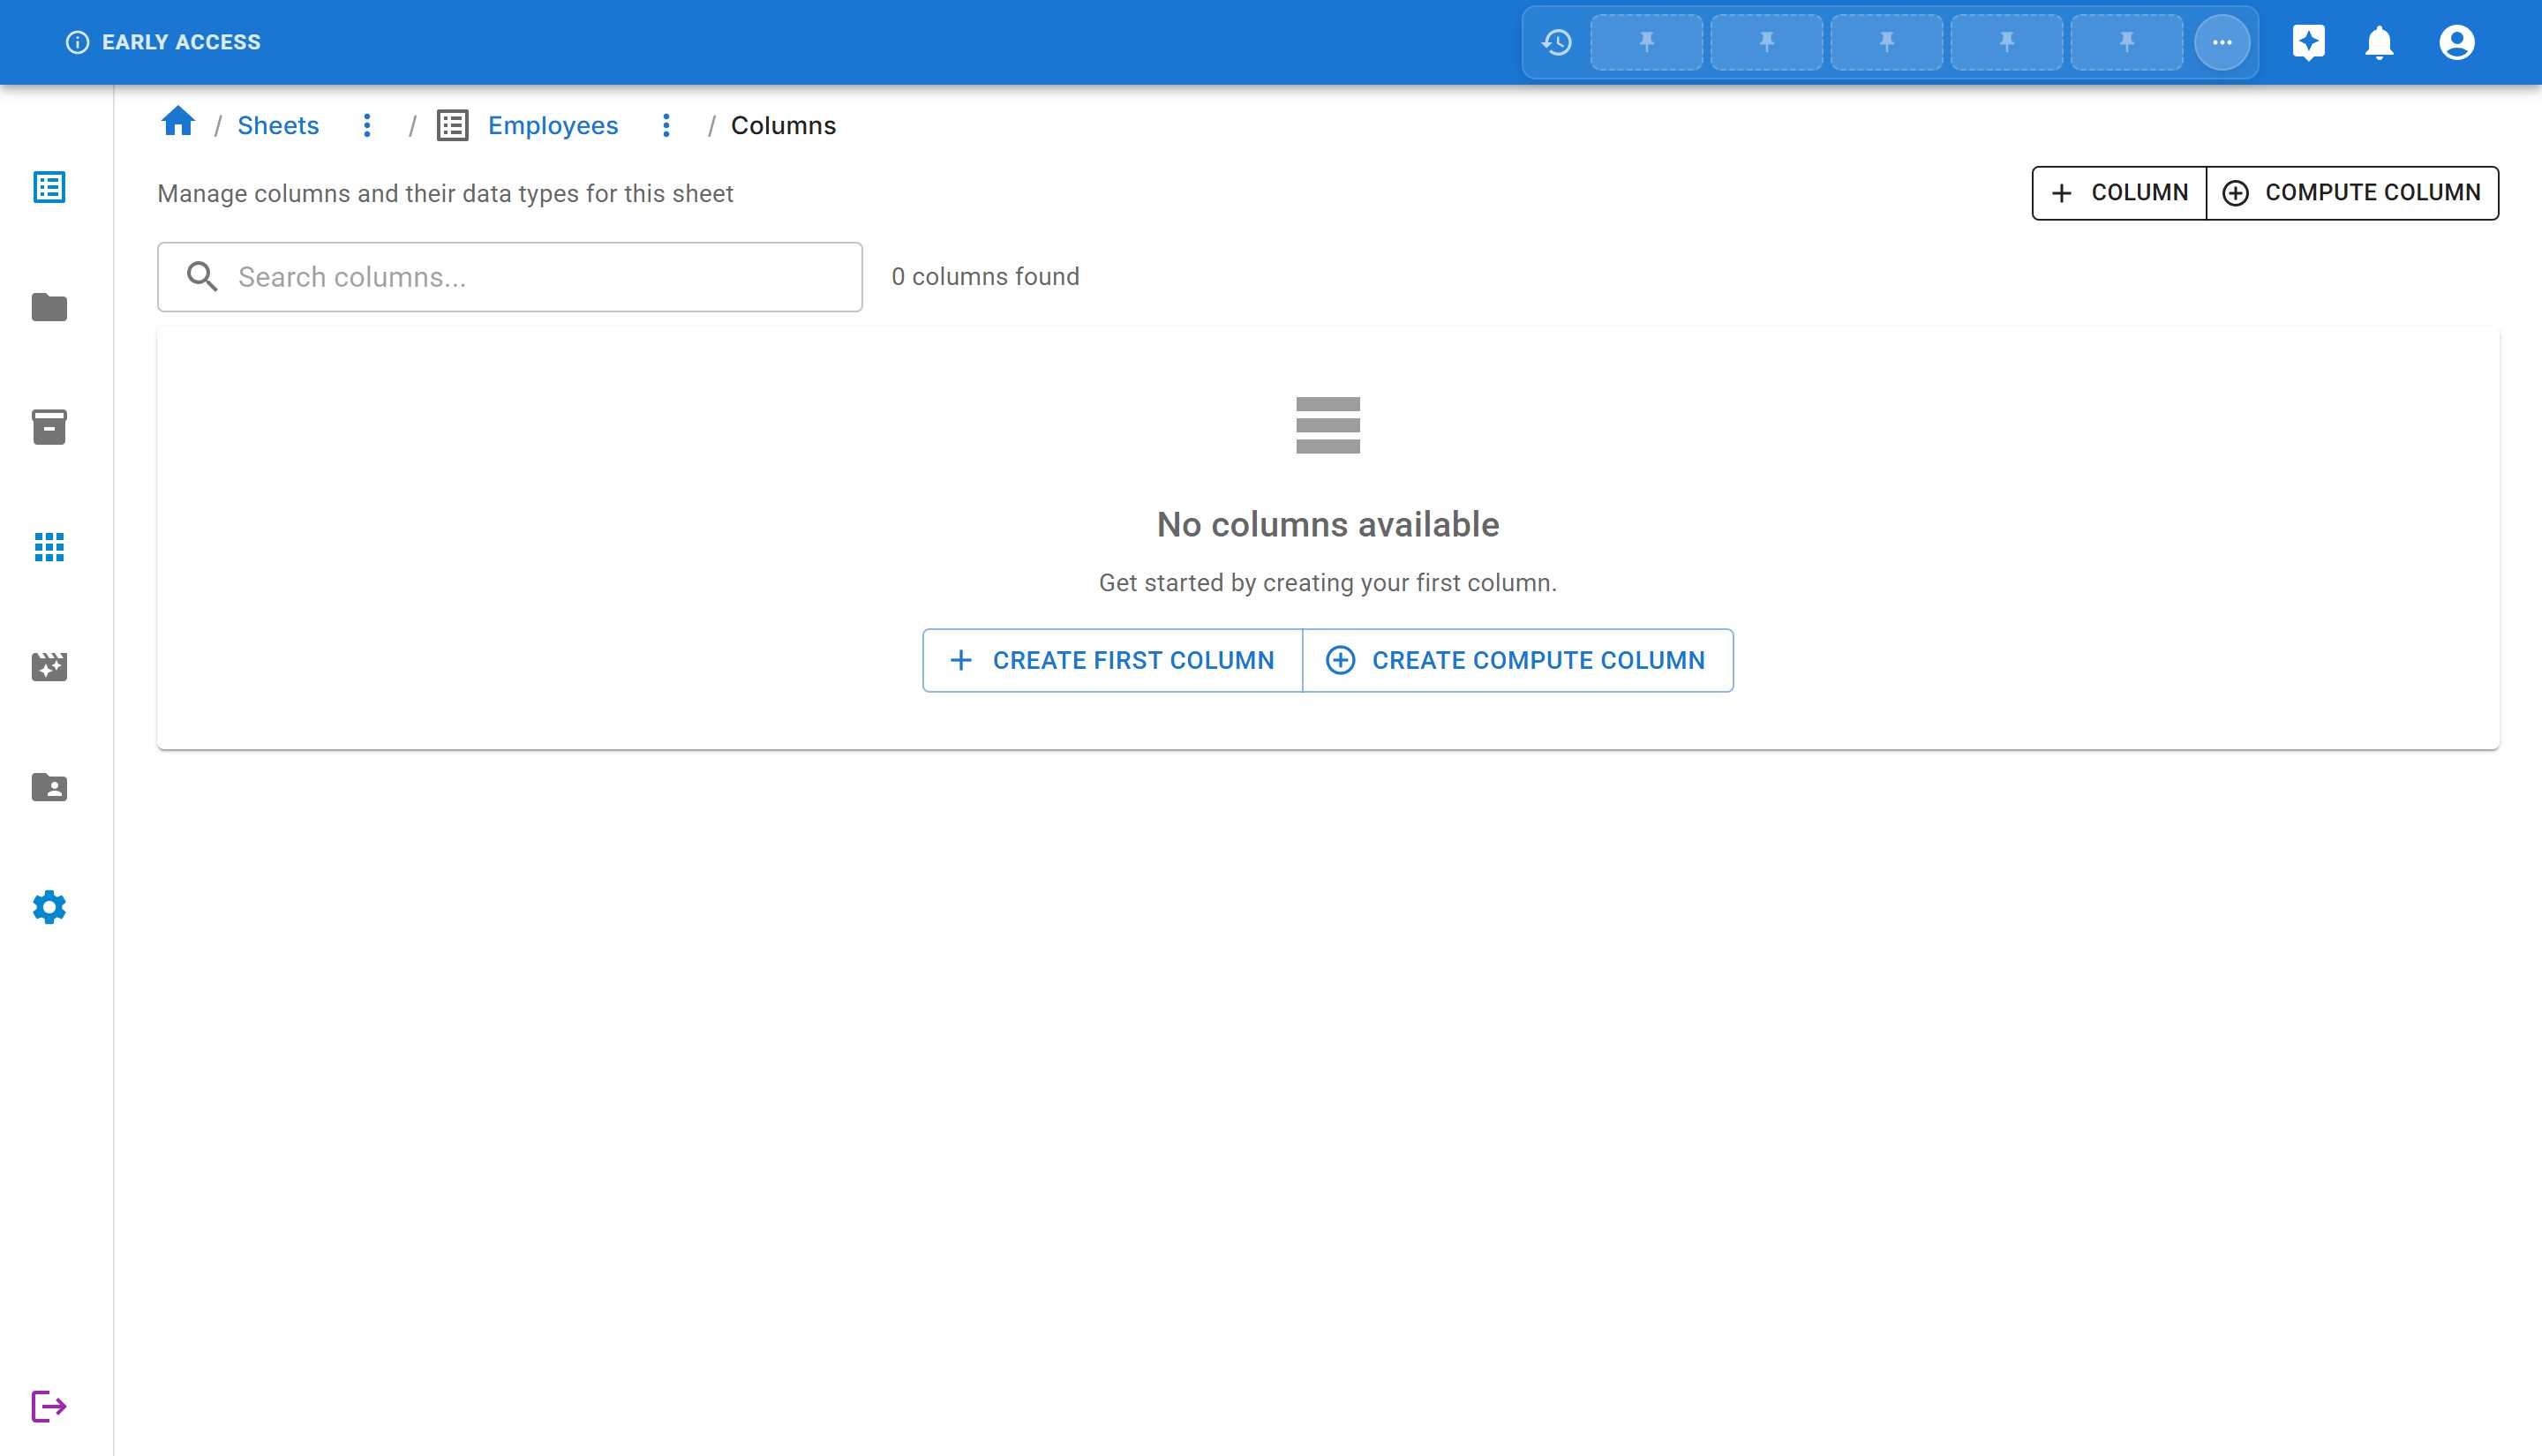
The page includes:
- Search bar - Quickly find specific columns by name
- + COLUMN button - Add new regular columns
- + COMPUTE COLUMN button - Create calculated columns
- Column list - All existing columns with their properties
- Action buttons - Edit or delete individual columns
Creating Columns
Section titled “Creating Columns”Creating a Regular Column
Section titled “Creating a Regular Column”-
Click the ”+ COLUMN” button at the top (or “CREATE FIRST COLUMN” if you don’t have any columns yet)
-
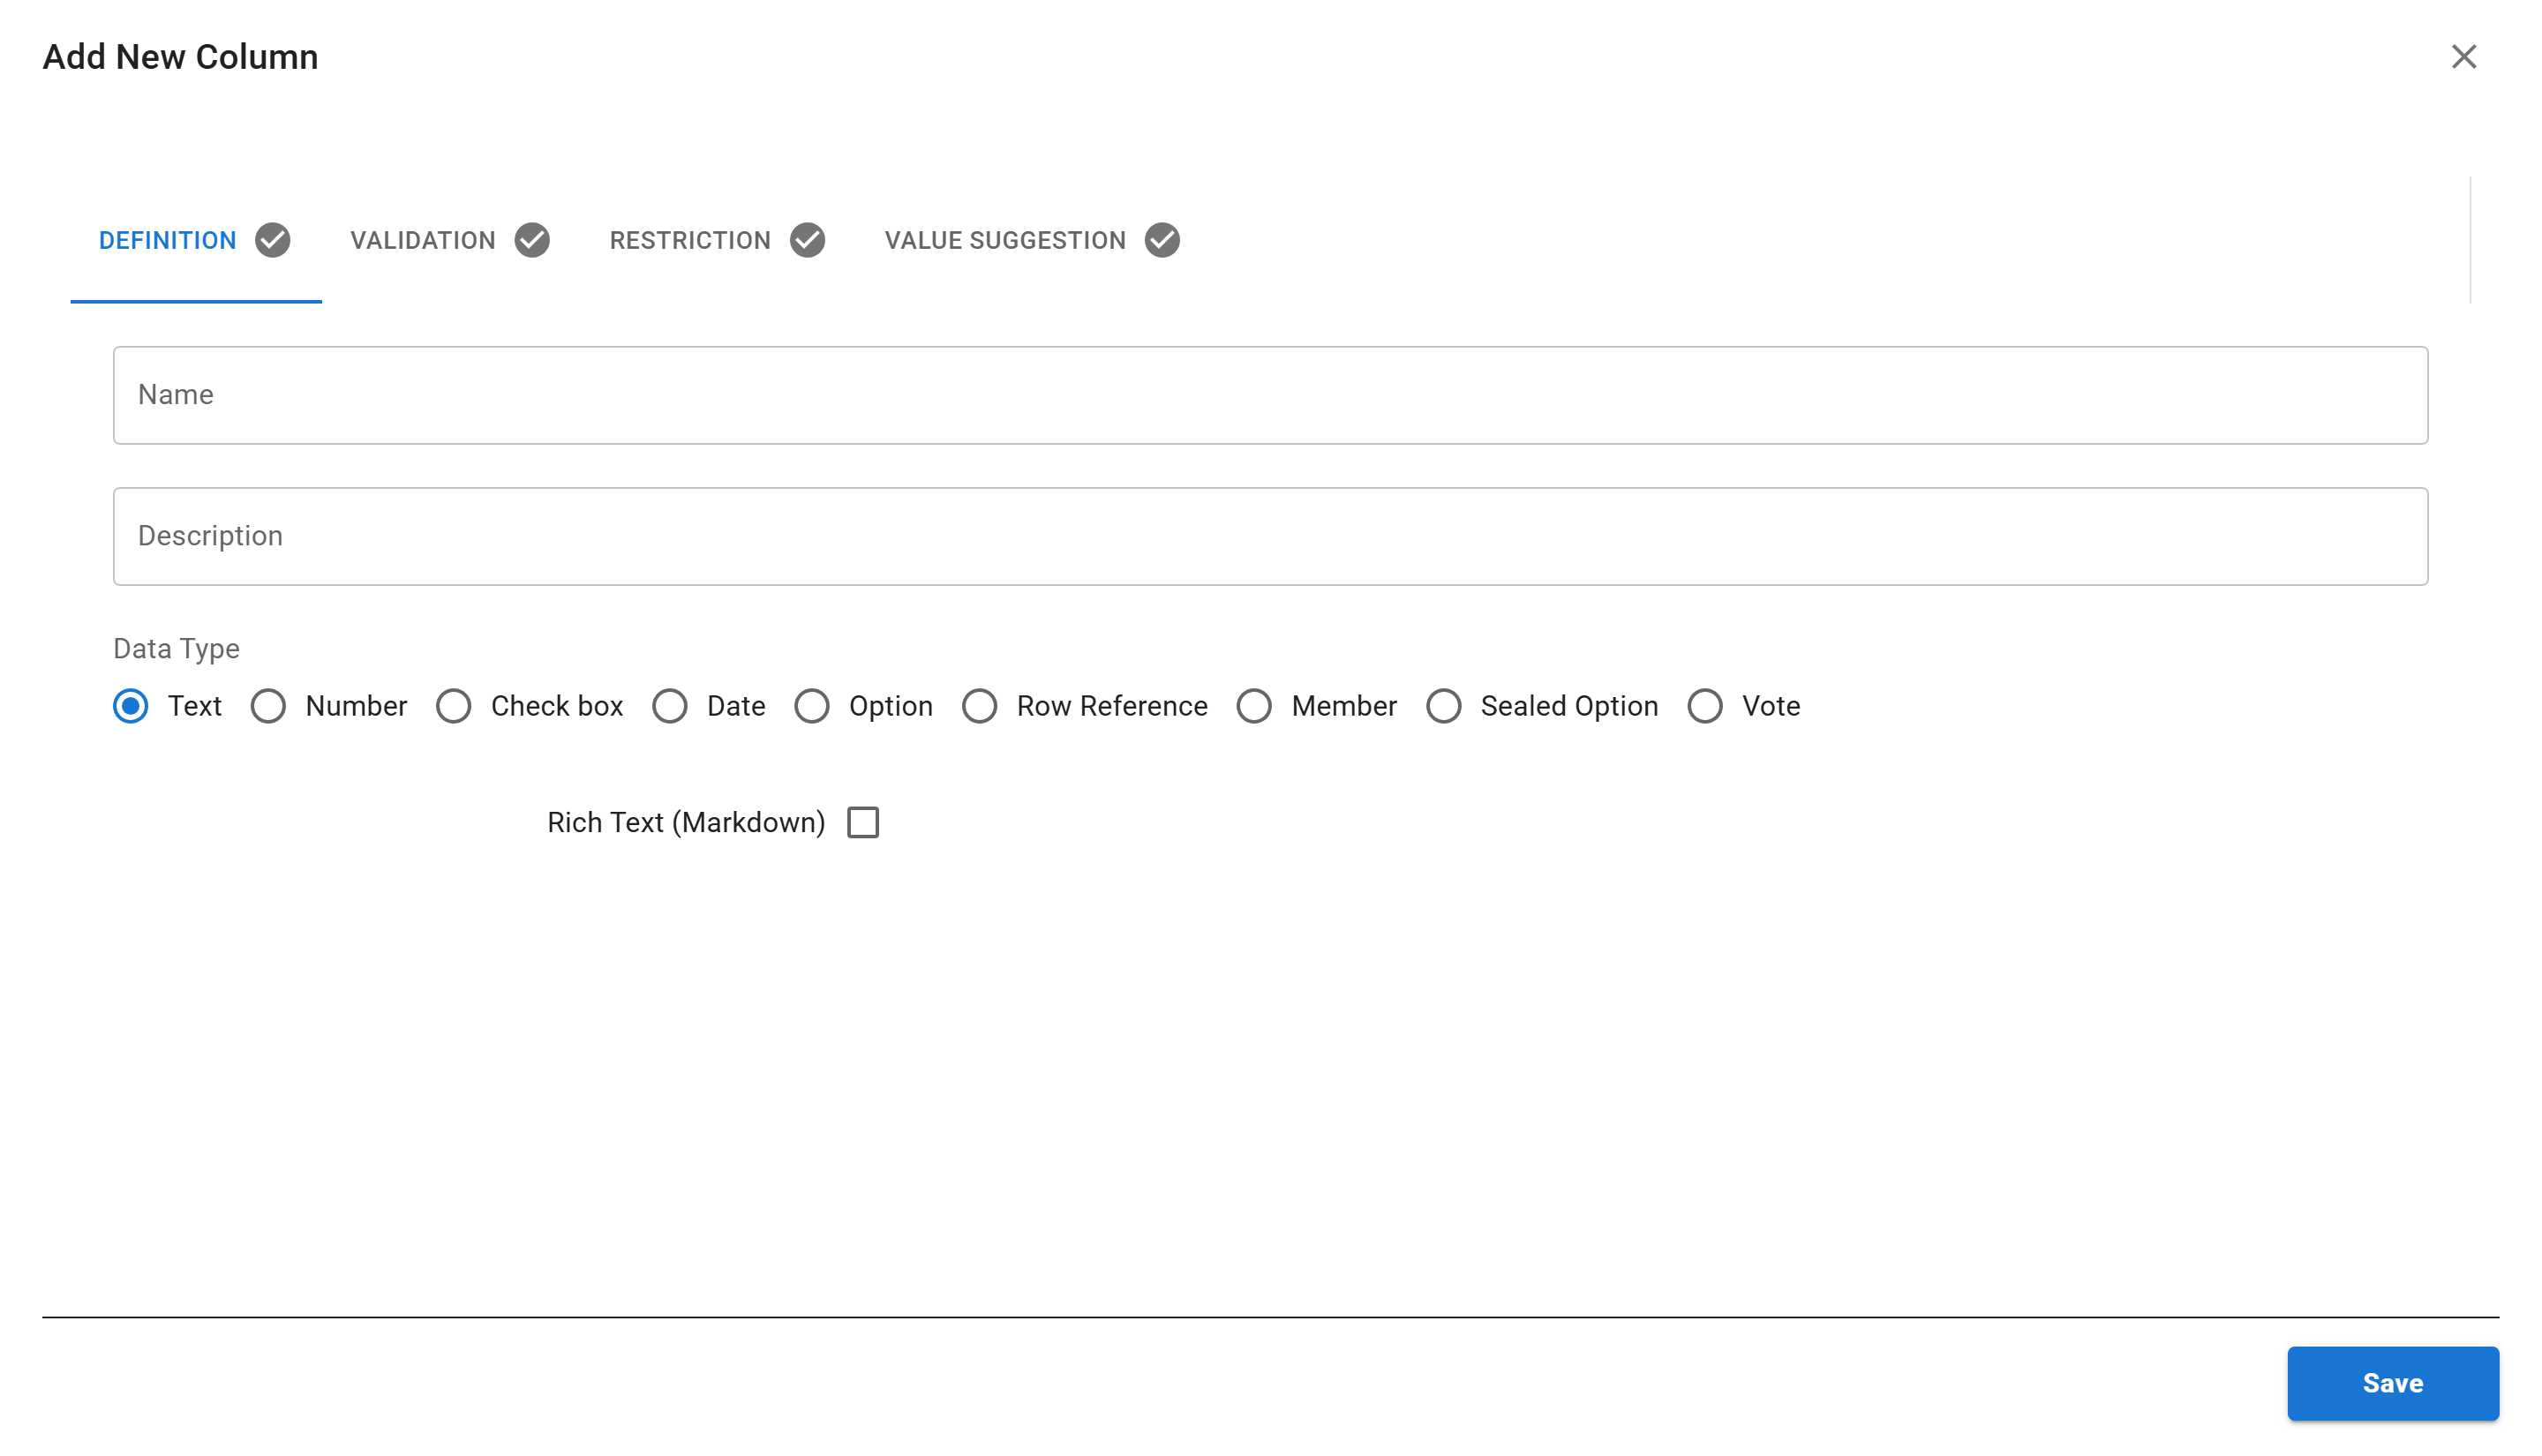
The “Add New Column” dialog appears with four tabs:
- Definition - Basic column information
- Validation - Rules for data validation
- Restriction - Access and permission settings
- Value Suggestion - Auto-complete options
-
Fill in the Definition tab:
- Name - The display name of the column
- Description - Optional description to explain the column’s purpose
- Data Type - Select from available data types (see below)
-
Optionally configure other tabs:
- Validation - Add rules like required fields, min/max values, regex patterns
- Restriction - Control who can view or edit this column
- Value Suggestion - Set up auto-complete suggestions
-
Click “SAVE” to create the column
Creating a Compute Column
Section titled “Creating a Compute Column”Compute columns automatically calculate values based on formulas. Click the ”+ COMPUTE COLUMN” button and define your formula. Learn more in the Computed Columns tutorial.
Available Data Types
Section titled “Available Data Types”Sheety App offers various data types to match your data needs:
| Data Type | Description | Example Use Case |
|---|---|---|
| Text | Plain text or rich text (markdown) | Names, descriptions, notes |
| Number | Numeric values (integers or decimals) | Age, salary, quantity |
| Check box | True/false or yes/no values | Active status, completed tasks |
| Date | Date and optionally time | Birth date, hire date, deadline |
| Option | Single or multiple choice from predefined list | Department, status, category |
| Row Reference | Link to another row in a different sheet | Manager reference, related items |
| Member | Reference to workspace members | Assigned to, created by |
| Sealed Option | Once a user selects an option, only they can change it | Personal assignments, claimed items |
| Vote | Allow users to vote on options | Survey responses, polls |
Example: Creating an Option Type Column
Section titled “Example: Creating an Option Type Column”The Option data type creates a dropdown list of predefined choices:
- Click ”+ COLUMN” button
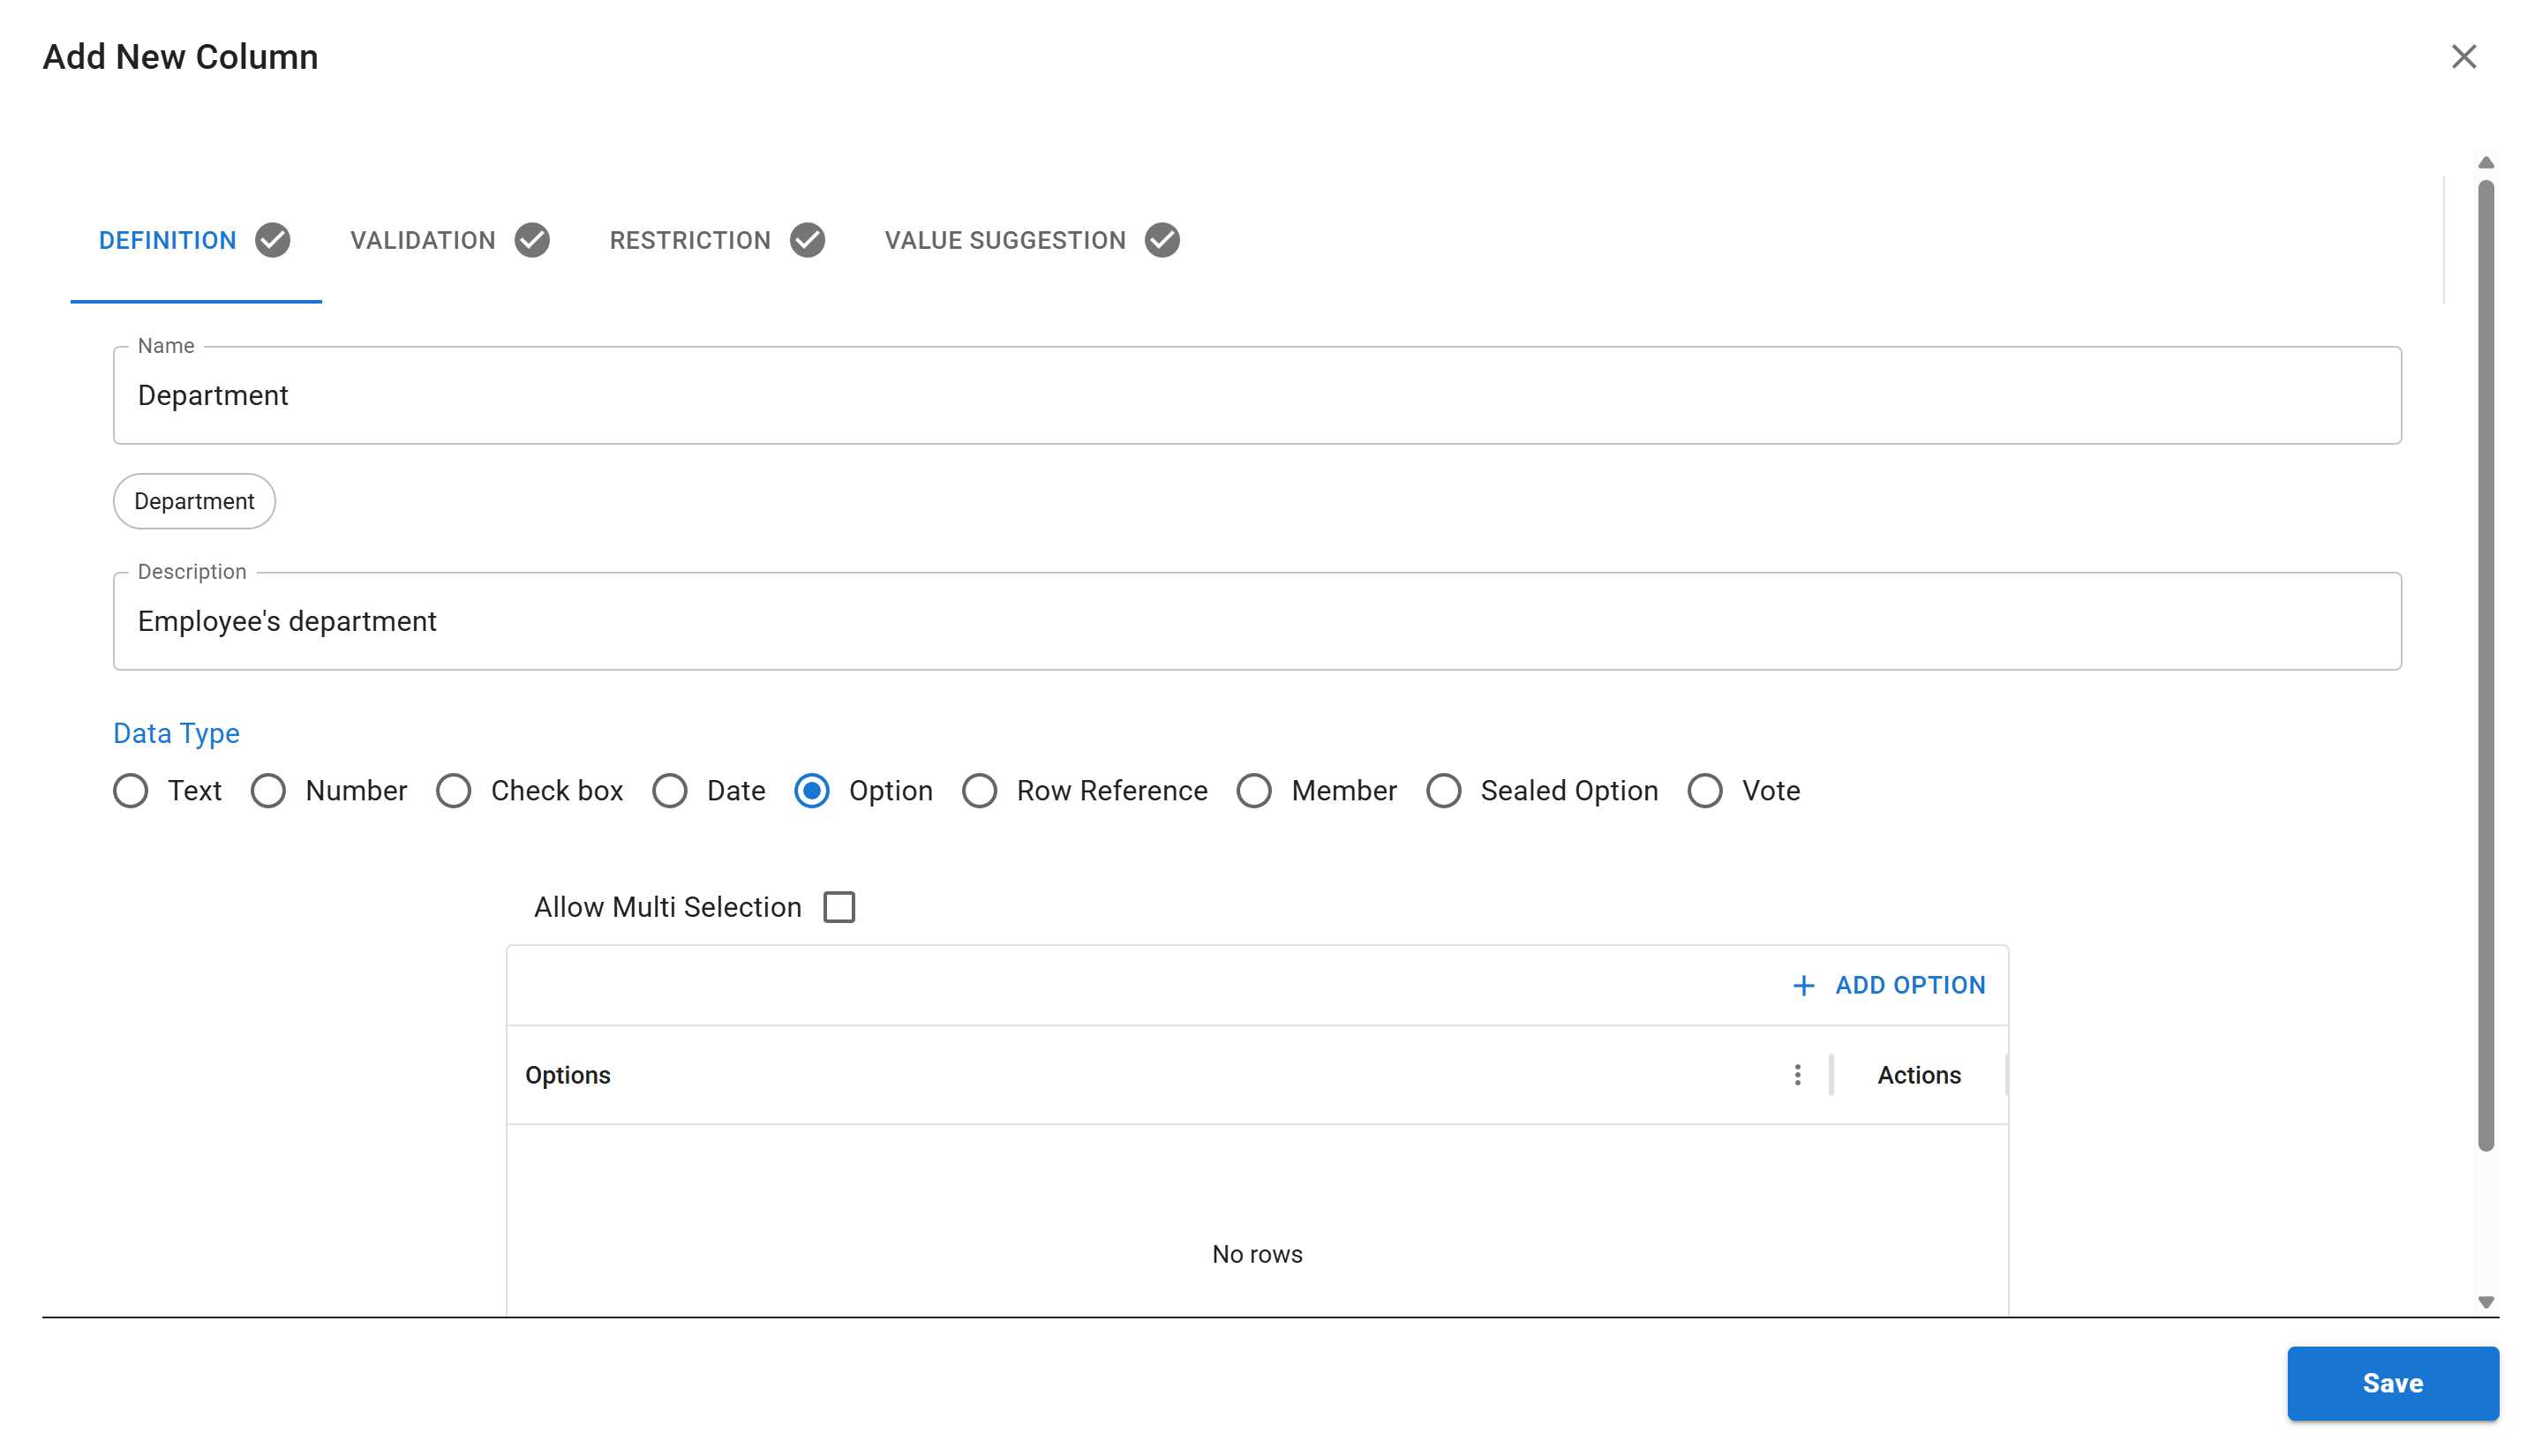
- Enter:
- Name:
Department - Description:
Employee's department - Data Type: Select Option
- Name:
-
When you select “Option”, additional fields appear:
- Allow Multi Selection - checkbox to allow selecting multiple options
- Options grid - where you define the available options
-
Click ”+ ADD OPTION” to add options:
- Type
Engineeringin the first option - Click ”+ ADD OPTION” again to add more (like “Sales”, “Marketing”, “HR”)
- Type
-
Click “SAVE”
Editing Columns
Section titled “Editing Columns”To modify an existing column:
- Find the column in the list (use the search bar if needed)
- Click the edit icon (pencil) next to the column
- Make your changes in the dialog
- Click “SAVE” to apply changes
Deleting Columns
Section titled “Deleting Columns”To remove a column:
- Find the column in the list
- Click the delete icon (trash) next to the column
- Confirm the deletion
Reordering Columns
Section titled “Reordering Columns”To change the order of columns as they appear in your sheet:
- In the sheet view (not the columns management page), use the column headers
- Drag and drop column headers to reorder them
- The new order will be saved automatically
Alternatively, you can reorder columns from the columns list by using drag handles if available.
Column Visibility
Section titled “Column Visibility”Control which columns are displayed in your sheet:
- In the sheet view, click the “Columns” button in the toolbar
- Check or uncheck columns to show or hide them
- Hidden columns are not deleted - they’re just not displayed
When to Use the Columns Management Page
Section titled “When to Use the Columns Management Page”The Columns management page is particularly useful for:
- Reviewing all columns - Get a comprehensive overview of your entire sheet structure in one place
- Bulk column creation - Efficiently add multiple columns in succession without navigating back and forth
- Planning data structure - Organize and architect your sheet’s data model before adding content
- Quick column search - Find specific columns instantly by name using the built-in search functionality